Documentation

    The complete Khedmati guide

    Every step, from creating your account to approving deliveries and withdrawing earnings, with real screenshots of the actual product.

    For Clients: Hiring

    Everything you need to go from "I need this done" to an approved delivery, whether you buy a ready-made service or post a custom job.

    Create your account

    Sign up with your email and choose the Client role (you can add the freelancer side later). Confirm your email from the link we send you, and you are in. No payment details are needed to join.
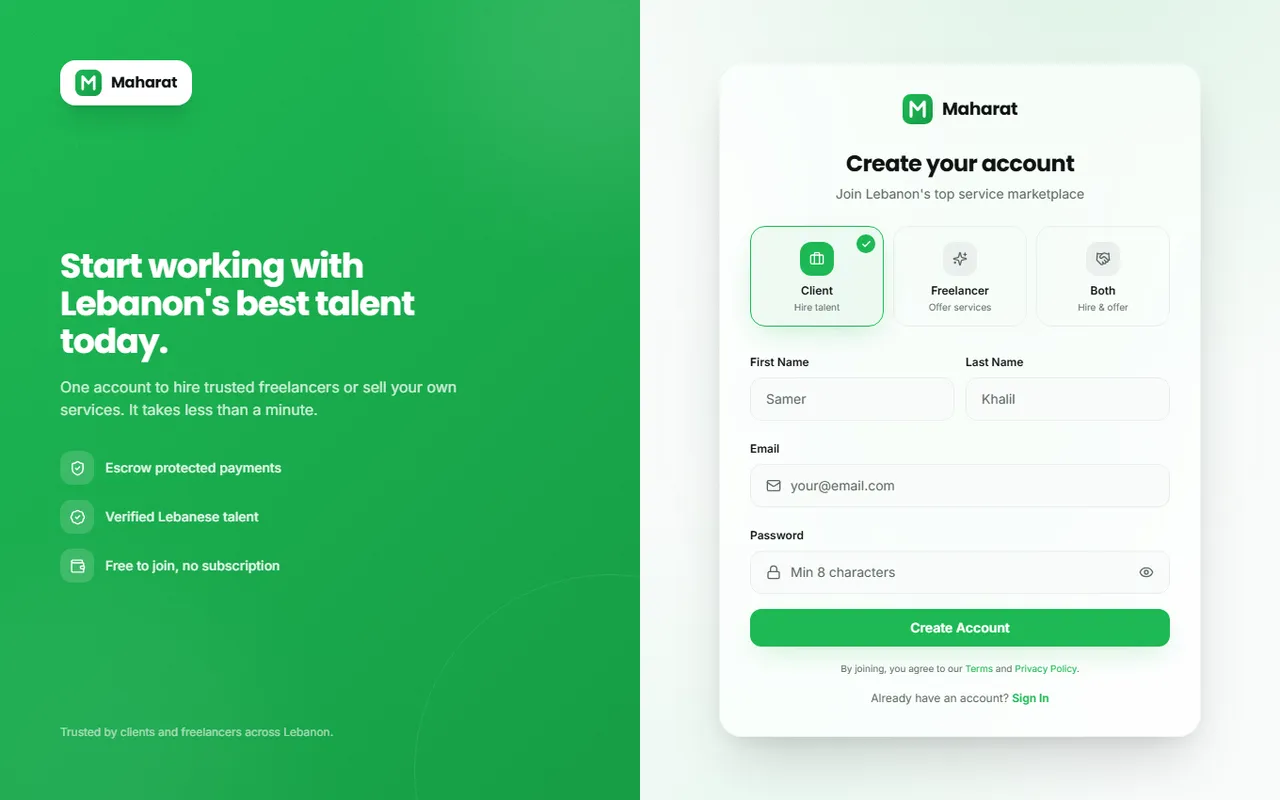
    The Khedmati signup page with role selection

    Tips

    • Pick 'Both' if you plan to hire AND sell: you get both dashboards
    • Check spam if the confirmation email does not arrive within a minute
    Explore services

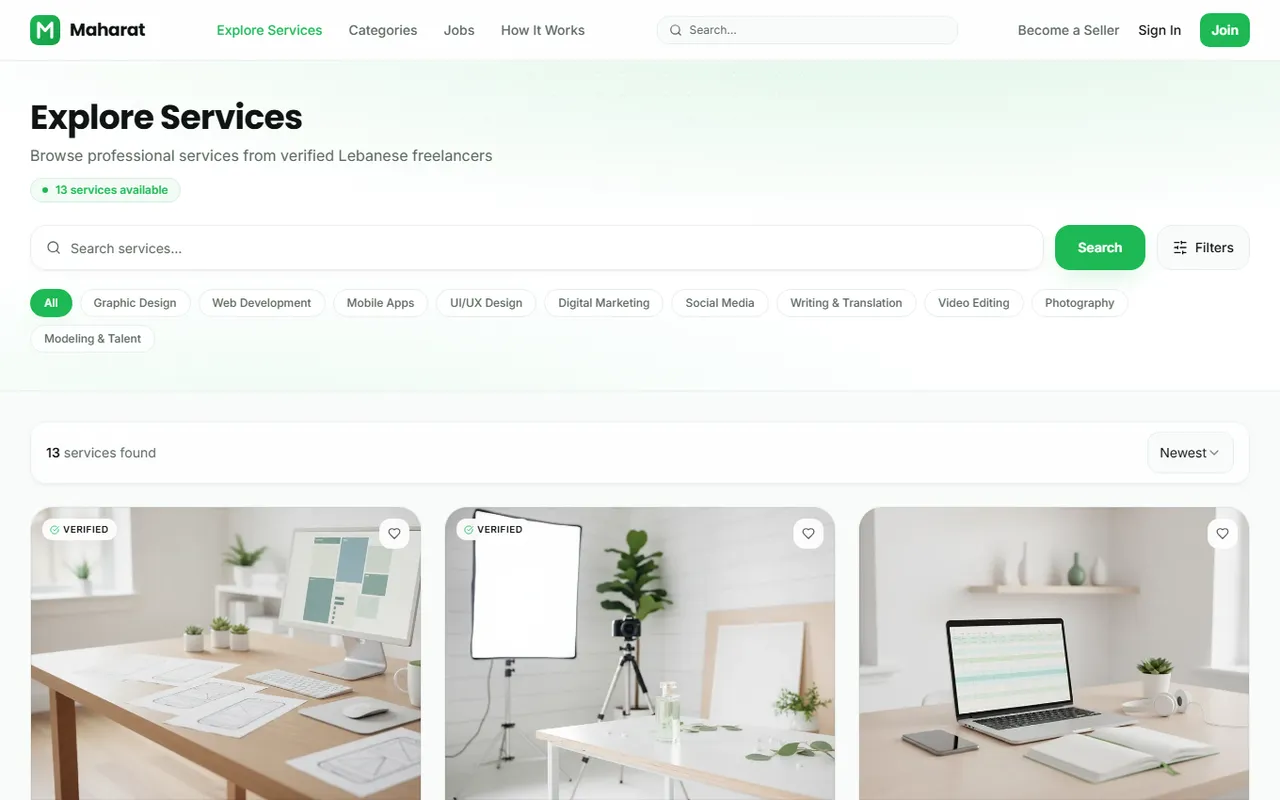
    Head to Explore and browse ready-made services by category, price, delivery time, and rating. The search is live: results update as you type. Every card shows the starting price, the seller's rating, and their delivery time so you can compare at a glance.

    The Explore page with service cards and filters

    Tips

    • Use the category filters on the left to narrow down fast
    • The Verified badge means we confirmed the freelancer's identity

    Read the service page

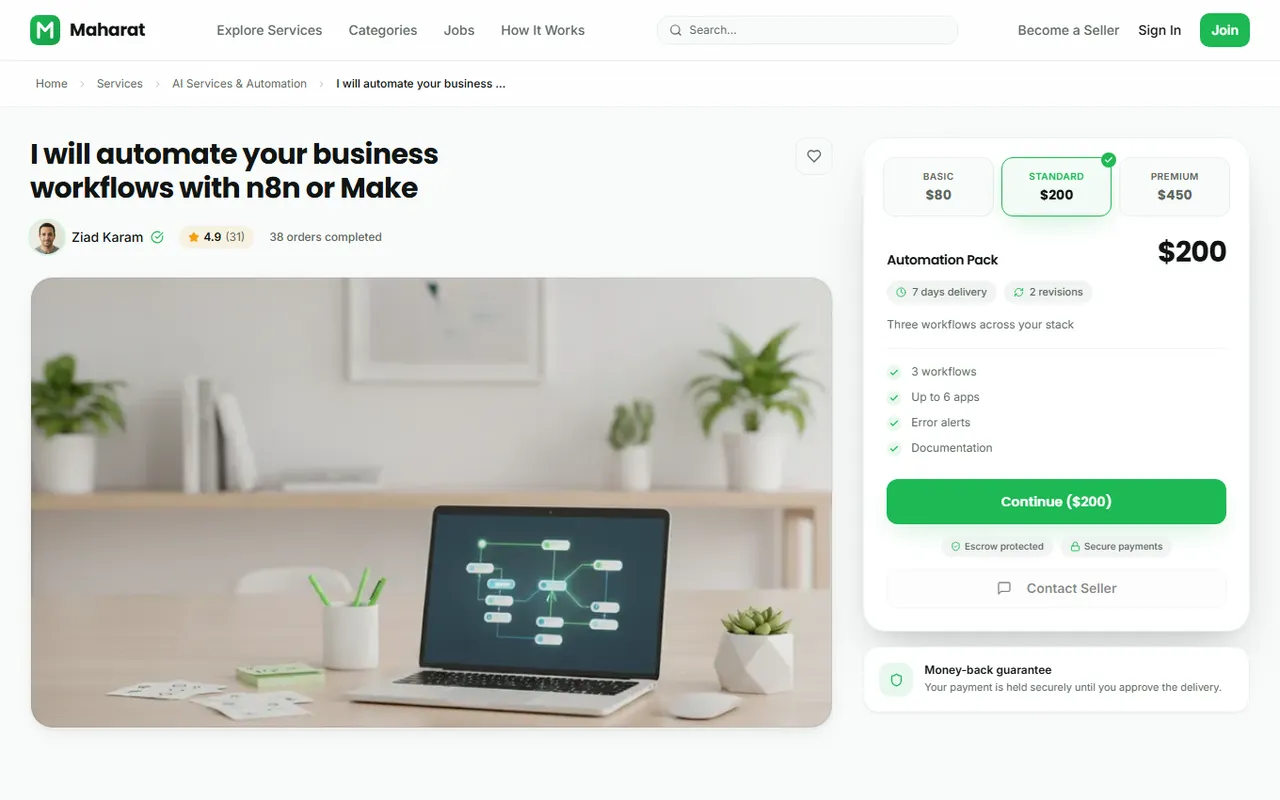
    A service page shows the full description, the seller's profile and reviews from real completed orders, and up to three packages: Basic, Standard, and Premium. Compare what each tier includes, its delivery time, and how many revision rounds you get.

    A service page with package tiers and reviews

    Tips

    • Reviews are tied to actual orders: nobody can fake them
    • Message the seller first for anything custom or unclear

    Place your order

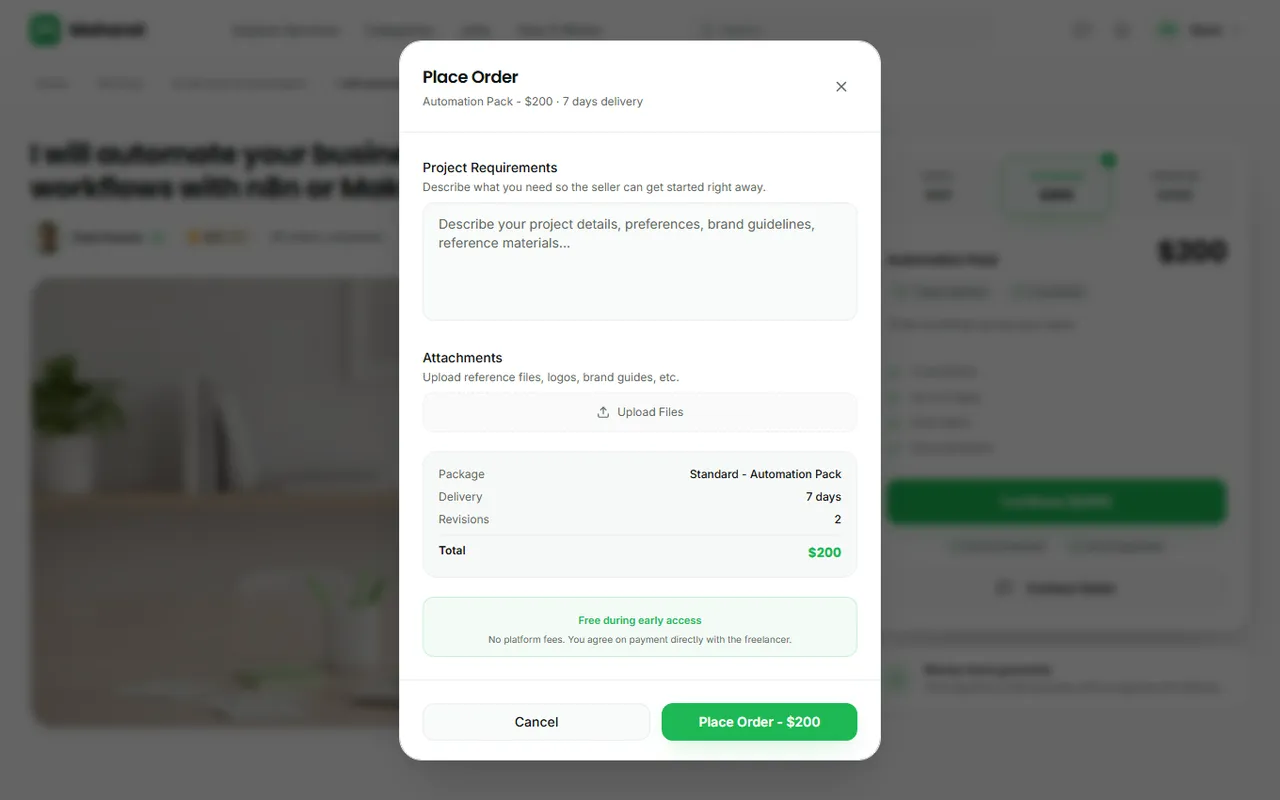
    Pick a package and click the order button. Describe your requirements in detail and attach any reference files (logos, brand guides, examples). The clearer your brief, the better your first delivery. During early access, ordering is free and you settle payment directly with the freelancer.

    The order form with requirements and attachments

    Tips

    • Write requirements as if the freelancer knows nothing about your business
    • Attach examples of styles you like: it saves a whole revision round

    Track your orders

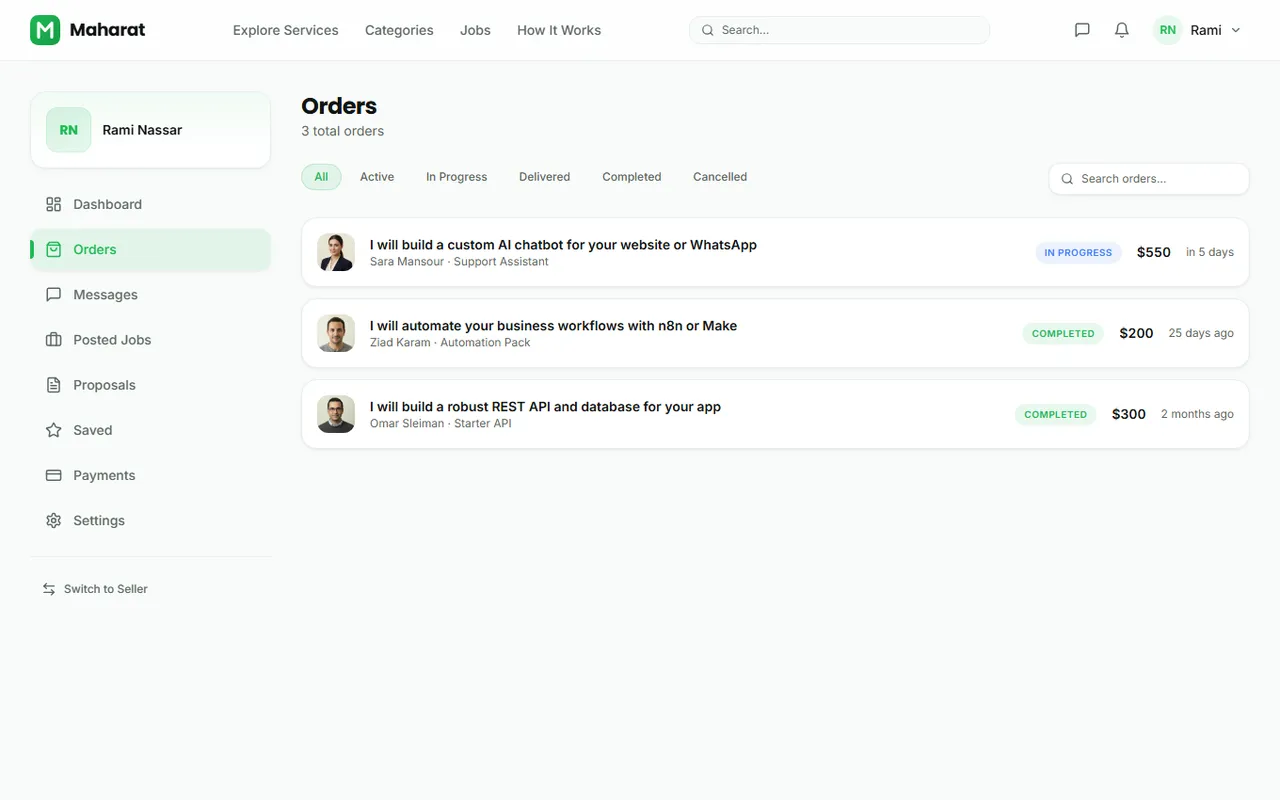
    Your Orders page lists everything you have bought with live status: pending, in progress, delivered, or completed. Statuses update in real time, so you always know where things stand without asking.

    The client orders list with statuses

    Collaborate and approve

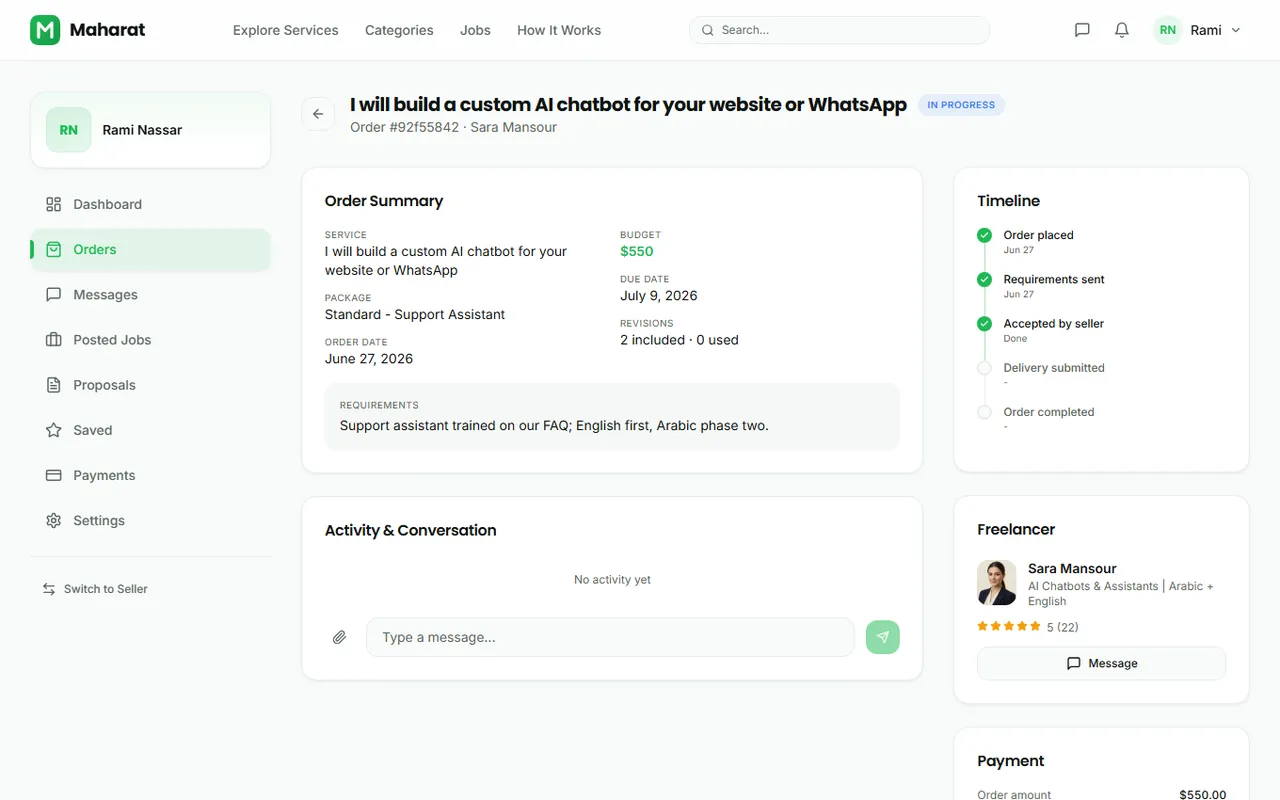
    Each order has its own private page with messaging, file sharing, and a delivery timeline. When the freelancer delivers, review the files and either approve the work or request a revision with specific feedback. Approving completes the order; then leave a review to help the next client.

    An order page with timeline, chat, and delivery actions

    Tips

    • Keep ALL communication on the order page: it is your protection if anything goes wrong
    • Be specific in revision requests: 'make the logo bigger on mobile' beats 'something feels off'

    Post a custom job

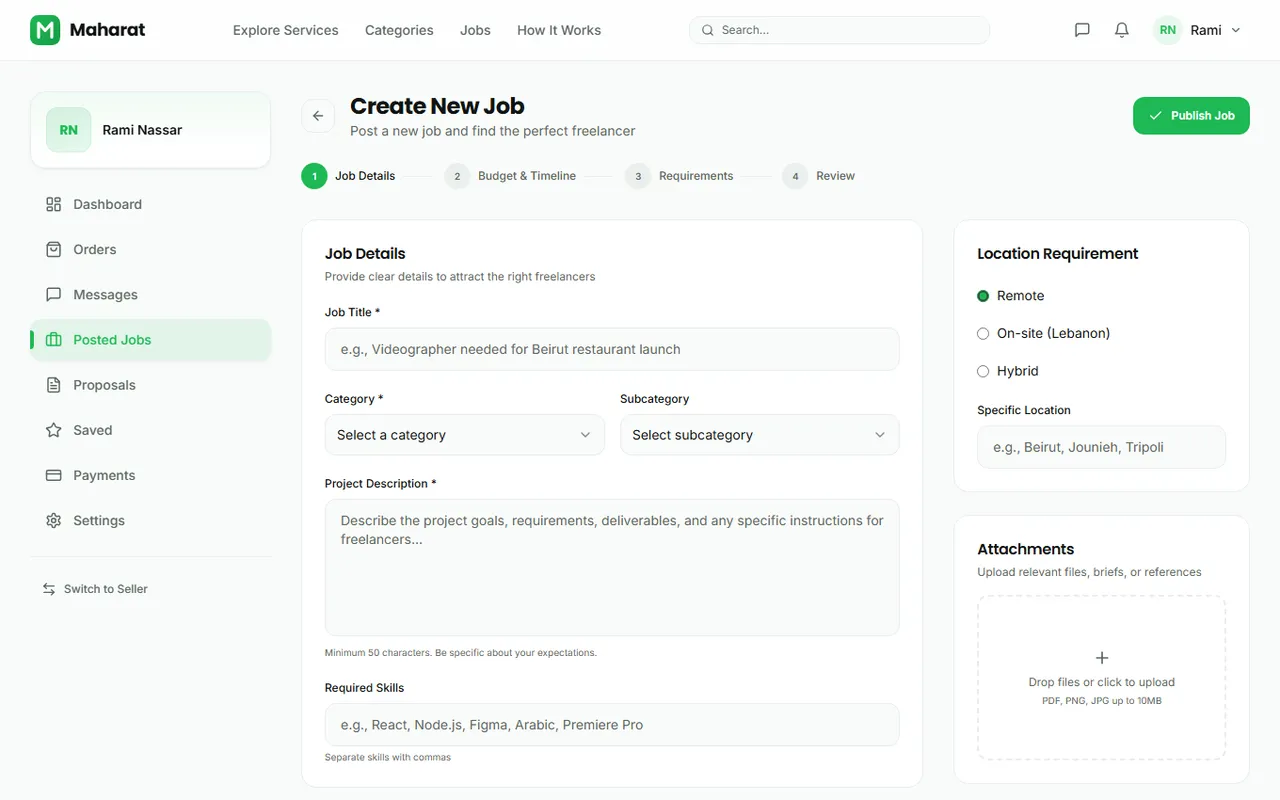
    Need something no ready-made service covers? Post a job: describe the project, set a budget range (fixed, hourly, or monthly), pick the category and required skills, and publish. Your phone number is required here, which keeps the board free of spam.

    The post-a-job form

    Tips

    • A realistic budget range attracts better proposals than 'negotiable'
    • Add screening questions to filter serious applicants

    Review proposals and hire

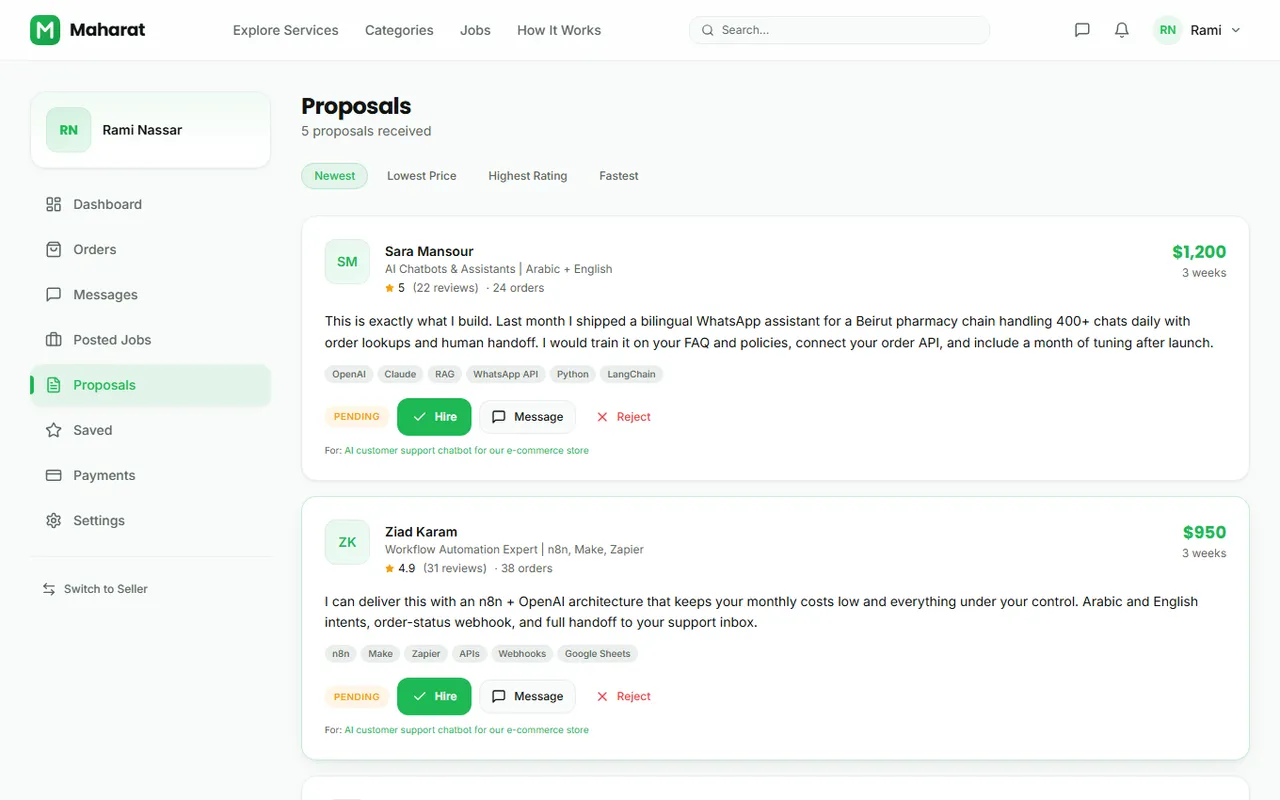
    Freelancers respond with proposals: a cover letter, their price, and a delivery estimate. Compare them side by side on your Proposals page, check each freelancer's profile and reviews, and accept the best one. Accepting creates an order and you continue like any other purchase.

    The proposals inbox for a posted job

    For Freelancers: Selling

    From zero to your first completed order and withdrawal: how to set up shop, win clients, and get paid on Khedmati.

    Join as a freelancer

    Sign up with the Freelancer role and complete the onboarding: your professional title, skills, hourly rate, and portfolio pieces. This becomes your public profile, so treat it like your storefront window.

    The Become a Seller page

    Tips

    • A real photo and a specific tagline ('Shopify developer for restaurants') outperform generic ones
    • Add portfolio pieces even if they are personal projects

    Meet your dashboard

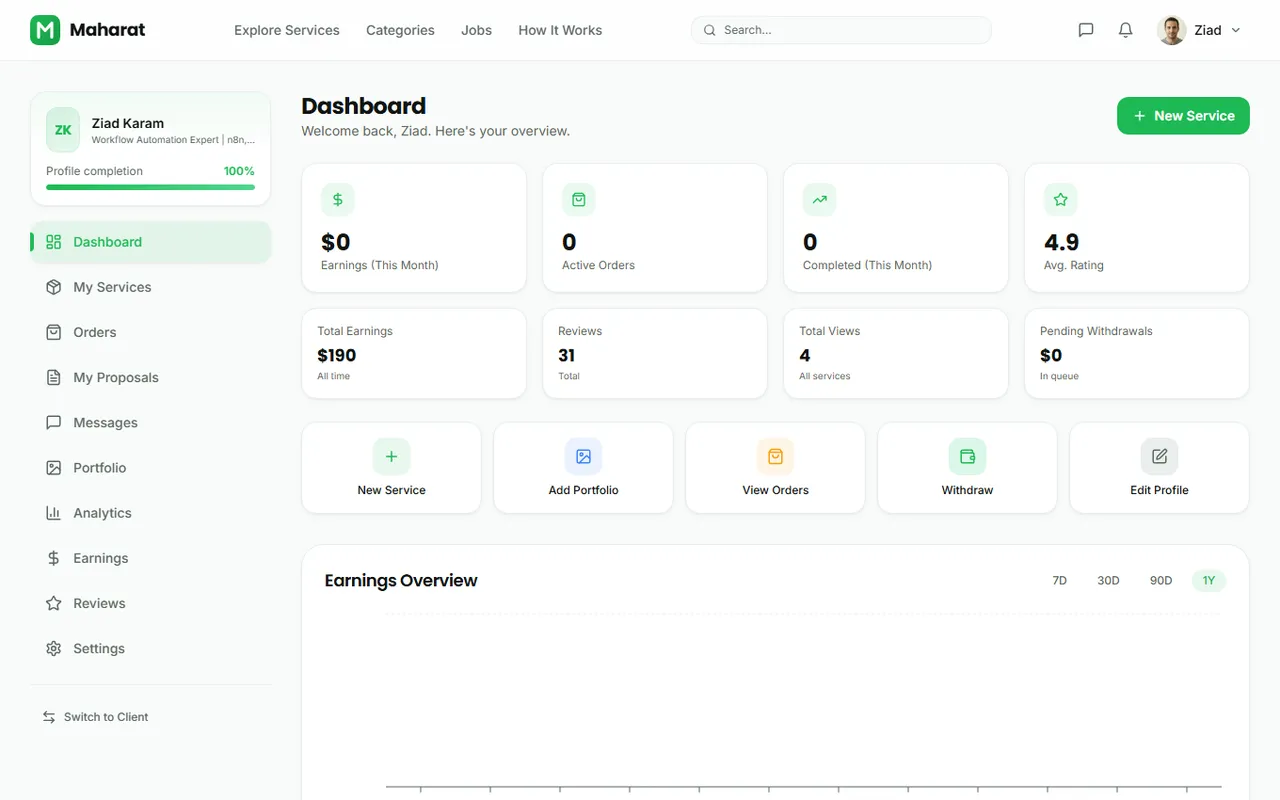
    Your seller dashboard shows everything at a glance: active orders, monthly earnings, your rating, profile views, and quick actions. The profile completion bar in the sidebar tells you exactly what is missing; a complete profile gives clients far more reasons to pick you.

    The seller dashboard with stats and active orders

    Publish your first service

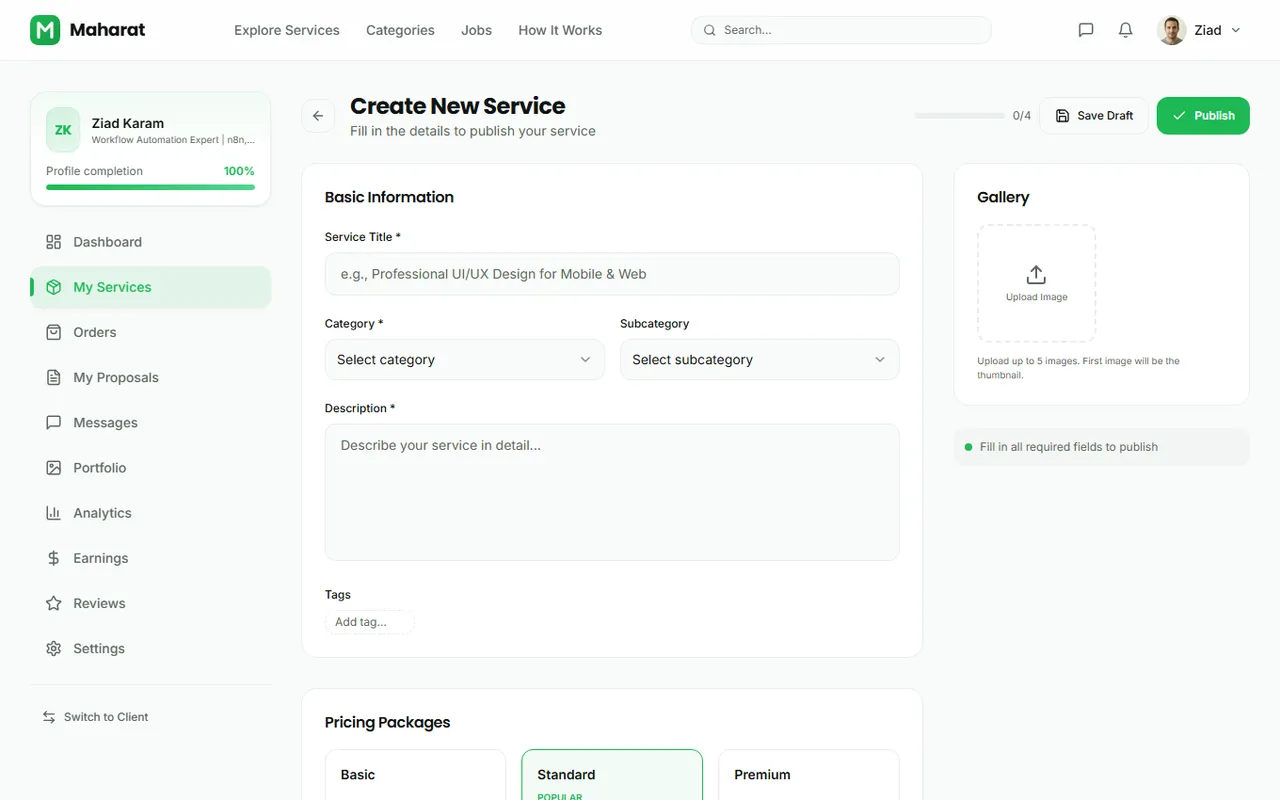
    Create a service with a clear, specific title ('I will build a bilingual restaurant website'), a detailed description, gallery images, and up to three packages. Package pricing is your conversion engine: a small Basic tier gets clients in the door, Standard is your real offer, Premium captures bigger budgets. A verified phone number is required to publish.

    The create service form with packages

    Tips

    • Titles starting with 'I will...' convert best: they say exactly what the client gets
    • Price Basic low at the start: your first reviews are worth more than your first dollars

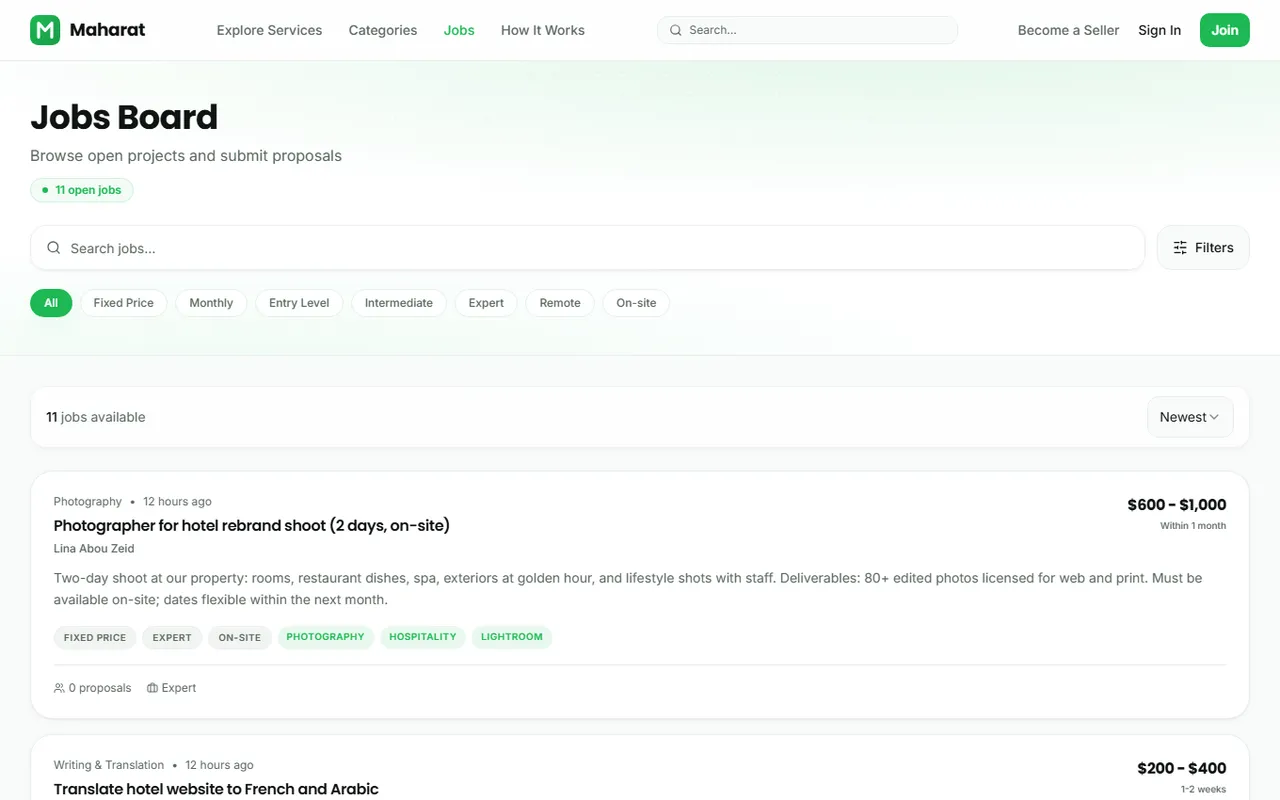
    Browse the jobs board

    Do not wait for orders: the Jobs board lists what clients need right now, with budgets attached. Filter by your category and check it daily. Early proposals get read first, so being quick to a fresh job is a real advantage.

    The jobs board with open client projects

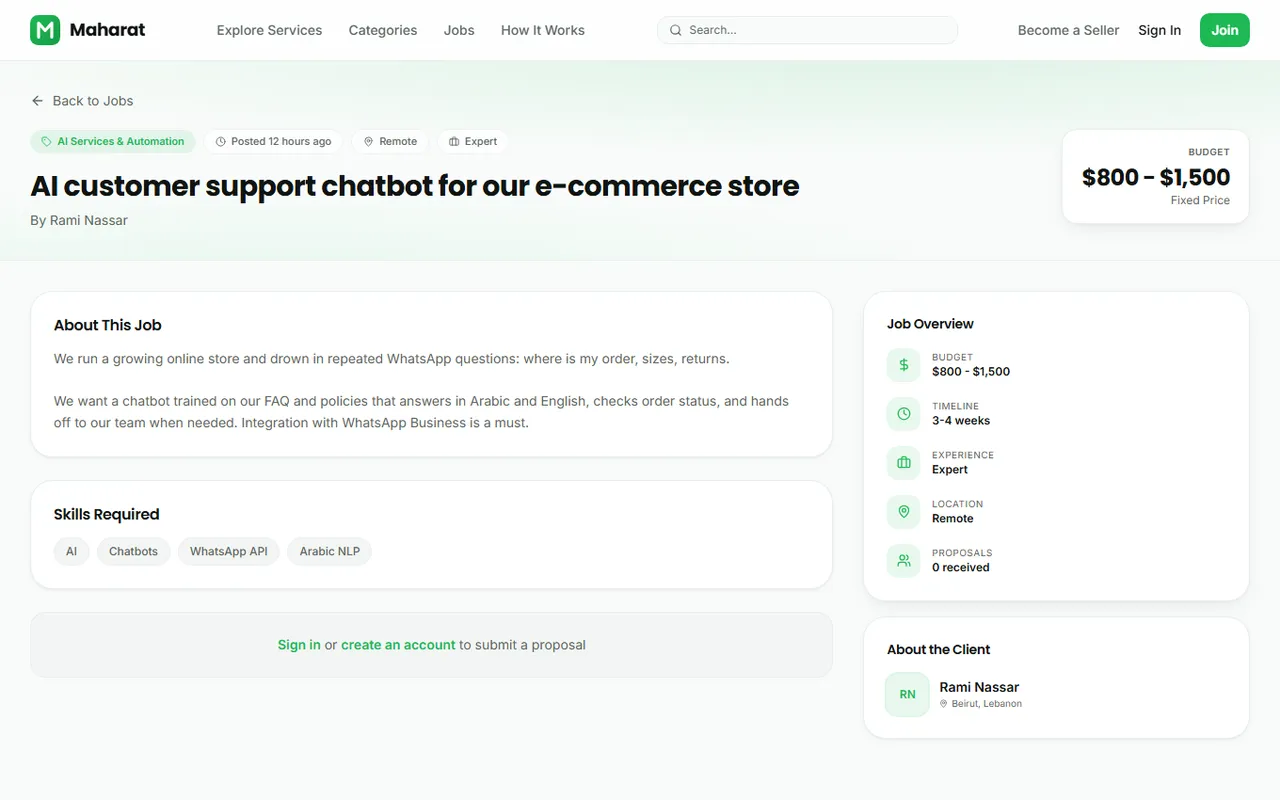
    Send winning proposals

    Open a job and send a proposal: your price, delivery estimate, and a cover letter. Reference the client's actual project in the first sentence; templates are obvious and get skipped. Mention one similar thing you have done and how you would approach theirs.

    A job page where freelancers submit proposals

    Tips

    • Short beats long: 4 to 6 focused sentences
    • Quote inside their budget range unless you can justify why not

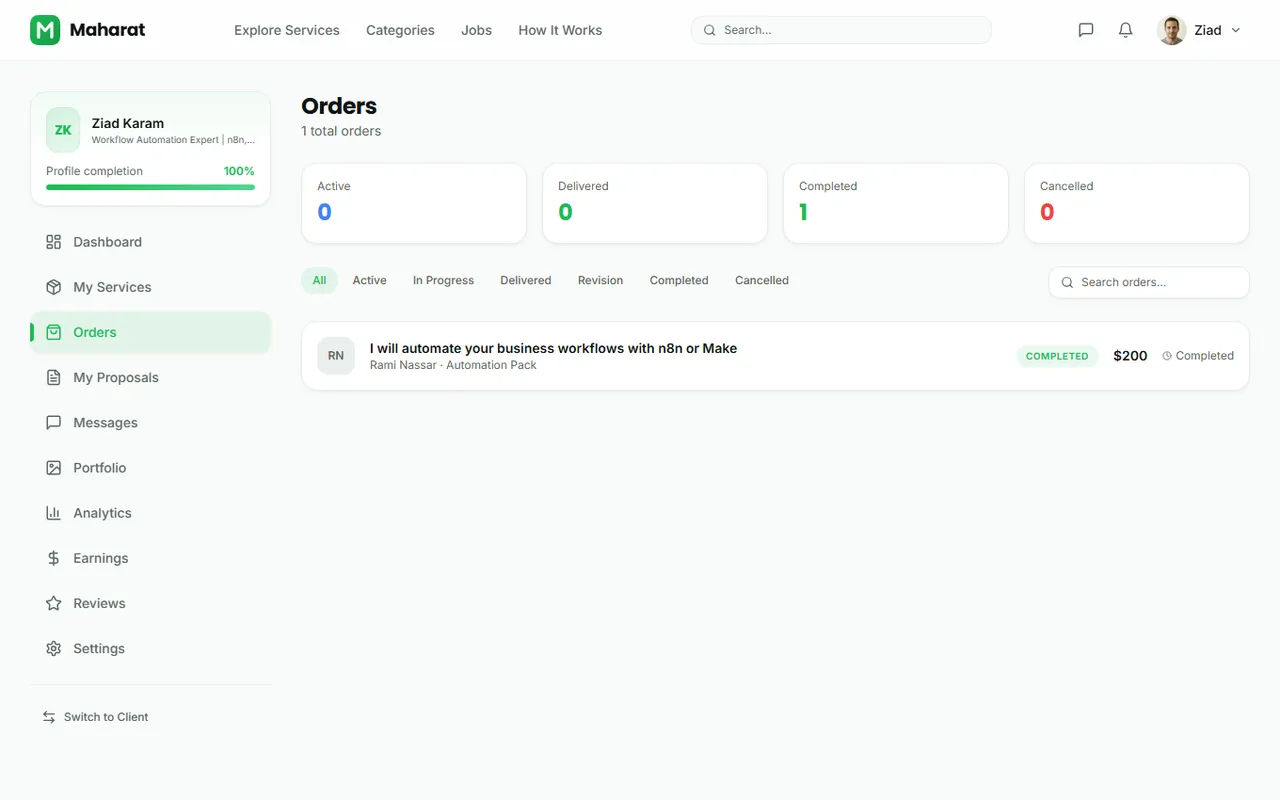
    Manage and deliver orders

    New orders land in your Orders page. Accept to start the clock, use the order page to ask questions and share progress, then submit your delivery with files and a summary. If the client requests a revision, respond quickly: turnaround speed shows up in your reviews.

    The seller orders page with statuses

    Tips

    • Deliver a day early when you can: it is the cheapest 5-star insurance there is
    • Never move the conversation off Khedmati: the order record protects you in disputes

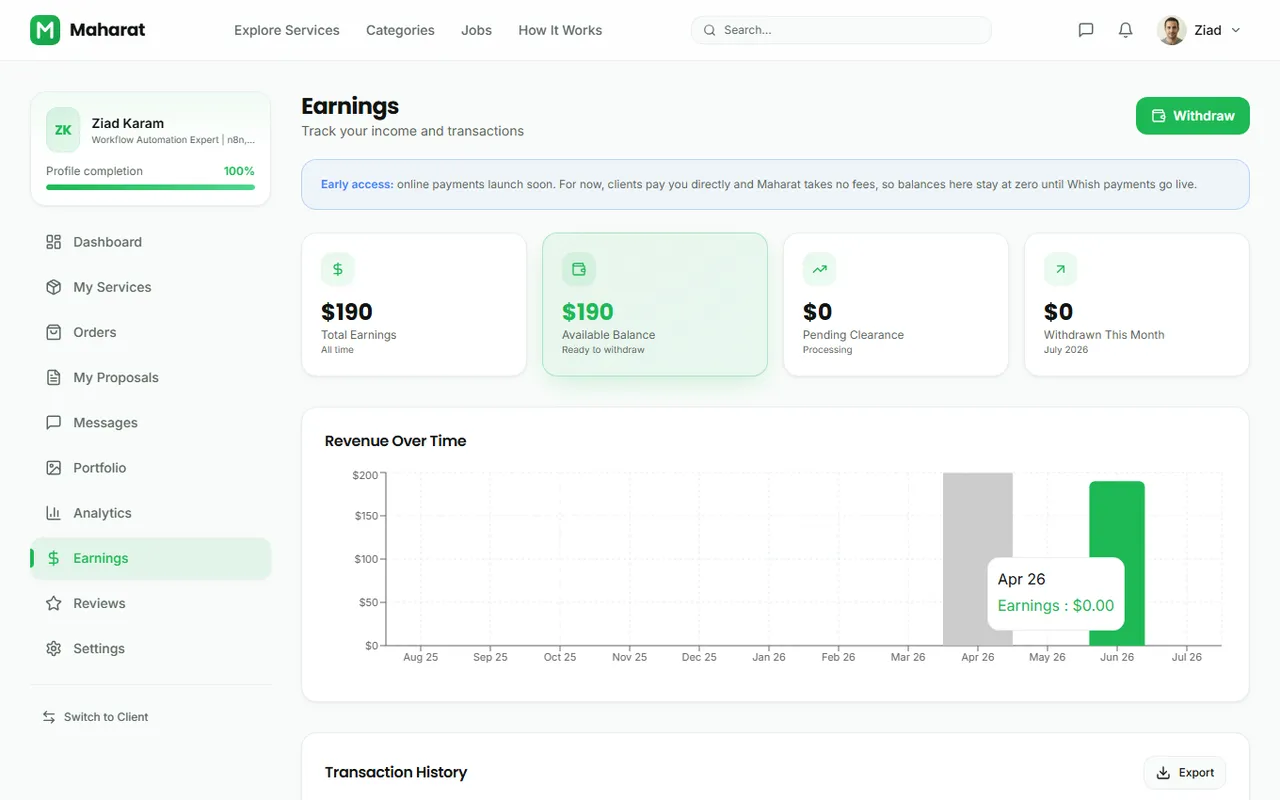
    Track your earnings

    The Earnings page shows your totals, monthly chart, and full transaction history with a CSV export. During early access clients pay you directly and Khedmati takes no fees; once Whish payments go live, approved orders credit your balance here automatically.

    The seller earnings page with charts

    Withdraw your money

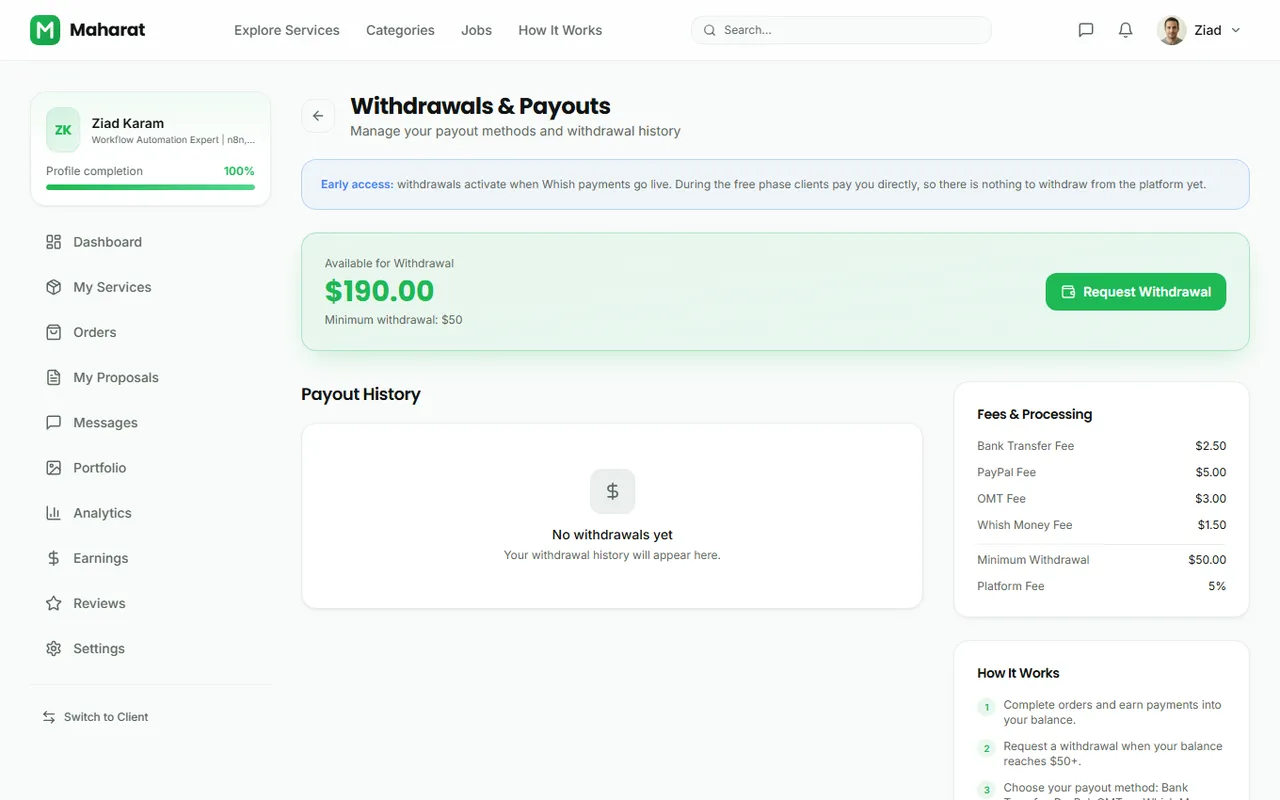
    When online payments are live, you withdraw from a $50 balance via Whish Money, OMT, or bank transfer, with requests processed within 24 to 48 hours. Set up your preferred payout method in Settings now so you are ready on day one.

    The withdrawals page with payout methods

    That is the whole product

    Anything this guide did not cover lives in the FAQ, and our team answers within one business day.